


Subcutaneous injection (SubQ injection) is a common and important way to deliver medication, such as insulin, anticoagulants, and some vaccines. For many patients, giving an injection at home for the first time can feel stressful or intimidating. If you’re new to SubQ injections, you’re in the right place. This article will walk you through practice steps before injection, answer common questions, and share practical tips to help you build confidence and feel more comfortable before giving yourself a real injection.
The First Step to Overcoming Self SubQ Injection Is Understanding It
How to give a subcutaneous injection is a common question for many patients who need to give injections at home. Feeling nervous or anxious when facing a needle for the first time is completely normal. You may worry about doing something wrong, using the wrong dose, injecting too little or too much medication, or choosing the wrong injection site and causing redness or bruising. The good news is that these concerns can be greatly reduced by learning the basics and practicing the technique in advance.
Understanding the process and being prepared is the first step toward safe and confident self-injection. Let’s start by learning what a subcutaneous injection is and how it is commonly used.
What is Subcutaneous Injection
A SubQ injection, short for subcutaneous injection, is a way of giving medication into the fat layer just under the skin, rather than into a muscle or directly into a vein.
This is one reason SubQ injections are considered relatively safe and are often suitable for self-injection. Because blood flow in the subcutaneous tissue is slower, the medication is absorbed gradually, helping it work in a steady and controlled way.
SubQ injections are especially important for people who need regular, ongoing medication, such as those managing diabetes or receiving anticoagulant (blood thinner) treatment.
Common SubQ Injection Sites
SubQ injections can be given in several areas of the body. Choosing the right injection site can affect how well the medication is absorbed and can also help reduce discomfort and skin irritation.
Common injection sites include:
- The abdomen
- The front or outer thigh
- The outer or back of the upper arm
- The upper outer area of the buttocks
For most people with diabetes or other patients who need to give SubQ injections themselves, the abdomen is the most commonly used site. The abdomen usually has enough fatty tissue, is easy to access, and tends to be less painful, making it a good choice for beginners and daily injections. To reduce the risk of skin irritation or hard lumps under the skin, it is recommended to rotate injection spots within the abdominal area. The thigh and upper arm are often used as alternative sites, while the buttocks are usually used when injections are given by someone else.
In practice, most patients use an insulin pen or a disposable syringe to give subcutaneous injections in the abdomen. During injection, a small fold of skin is gently pinched to lift the fatty tissue. The needle is then inserted at a 90-degree angle—or about a 45-degree angle if there is less fatty tissue—followed by slow and steady injection of the medication. For beginners, this standard abdominal injection method is relatively simple and helps build confidence over time.

How to Give Subcutaneous Injection(Training & Practice Guidance)
Before getting started, it’s important to note that the following information is provided for learning and practice purposes only. It is intended to help patients understand the basic process and logic of subcutaneous injection. Medication type, dosage, and injection technique may vary from person to person, so you should always follow the instructions given by your doctor or nurse. If you have any questions about the steps, or if you feel discomfort during injection, seek advice from a healthcare professional.
Step-by-Step Guide for Give Yourself SubQ Injection
1. Clean your hands and the injection site
Wash your hands thoroughly with soap and water. After choosing an appropriate injection site, gently clean the skin with an alcohol swab and allow it to air dry completely.
2. Pinch the skin
Using your thumb and index finger, gently pinch a small fold of skin to make the subcutaneous fat layer more prominent. (See image below for the correct pinching technique.) This step helps ensure that the needle enters the fat layer rather than the muscle, improving both safety and comfort.

3. Insert the needle
Insert the needle quickly and steadily at the angle recommended by your healthcare provider. Whether you are using a disposable syringe or an insulin pen, the goal is the same—to place the needle into the subcutaneous fat layer. In most cases, a 90-degree angle is used when there is enough fatty tissue. If the fat layer is thinner, a 45-degree angle may be recommended.
4. Inject the medication slowly
Keep the needle steady and push the medication in slowly and evenly. Avoid injecting too quickly, as this may cause discomfort.
5. Remove the needle and dispose of it properly
Once the medication has been fully injected, withdraw the needle smoothly at the same angle. You may gently press the injection site with a clean cotton pad for a few seconds, but do not rub the area, as this may irritate the skin. Used needles should be placed immediately into a sharps container or safely stored in a syringe case to prevent accidental needle injuries and reuse.
Frequently Asked Questions
Q1: Why is it important to pinch the skin?
Pinching the skin helps separate the subcutaneous fat layer from the muscle underneath. This makes the target injection layer clearer and allows the needle to enter the fat more easily instead of going too deep into the muscle. As a result, it reduces the risk of accidental intramuscular injection, which can cause more pain, discomfort, or changes in how the medication is absorbed.
Q2: What should I do if the injection is painful or causes bruising?
Mild pain or small bruises after a subcutaneous injection are fairly common and usually not a cause for concern. This may happen due to needle angle, injection speed, or accidentally hitting a small blood vessel. Injecting slowly, keeping your hand steady, and avoiding repeated injections in the same spot can help reduce discomfort. If you experience ongoing pain, noticeable swelling, or unusual symptoms, contact your doctor for advice.
Q3: Why do lumps or hard areas form under the skin?
Repeated injections in the same area over time can cause the fatty tissue under the skin to harden, forming lumps or firm areas. These may make injections less comfortable and can affect how well the medication is absorbed. To reduce this risk, it’s important to rotate injection sites regularly. For example, change specific spots within the same area or alternate between different areas, such as different parts of the abdomen or between the abdomen and the arm.
Q4: How should injectable medications be stored? Does temperature matter?
Many medications used for subcutaneous injection have specific storage requirements, especially regarding temperature. Some need to be kept refrigerated, while others should be brought to room temperature before injection to reduce discomfort. Always follow the instructions on the medication label or the guidance given by your healthcare provider. Do not change storage conditions on your own.
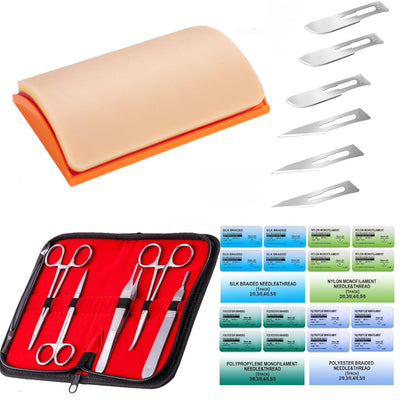
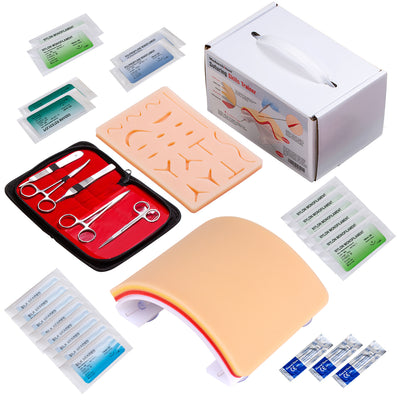
Practice Before Self SubQ Injection By Training Models
If you are new to SubQ injections, you can practice beforehand using Medarchitect’s SubQ injection training models. These models allow you to familiarize yourself with hand positioning, skin pinching, needle angle, and injection depth without worrying about pain or mistakes, helping you feel more confident when performing a real injection. Medarchitect offers several different SubQ injection models to choose from, depending on your learning needs.
- Belly Subcutaneous Injection Training Pad
- Wearable Abdomen Injection Practice Model
- Silicone Subcutaneous Injection Belly Simulator
- Folded Skin Subcutaneous Injection Abdomen Model

In addition to supporting patient self-injection practice, these training models are also ideal for healthcare professionals. Doctors and nurses can use them to demonstrate the correct technique to patients, helping them better understand the steps and principles of SubQ injection. These models are also suitable for health education or public outreach, making the process of learning subcutaneous injection clear and easy to understand.
Conclusion
How to give a subcutaneous injection? After reading this article, you should have a clearer understanding of the basic principles of subcutaneous injection, common injection sites, and the key steps involved. Before giving yourself a real injection, it is recommended to practice first using a subcutaneous injection training model to become familiar with the entire process and build confidence.


